
It feels about time to share another of the seasonal crafts I’ve been trying, with the natural treasures I collected over the autumn months. This one is a particularly cosy, wintery craft: creating natural firelighters out of everyday materials! These are really easy to make yourself, and the finished product can be used at home, or gifted to friends and family. Read on below!
One of the things I found in abundance over the autumn were pine cones. I collected a variety of pine cones while out on walks, both in the countryside when visiting my parents, and in the city while at my flat. My partner told me of a ‘secret pine cone spot’ in the city centre, and together we collected a whole boxful of these large, flat-based cones. They have been perfect for making Christmas ornaments, but I needed to put them to another use if I was to use them all up.
While watching a winter vlog series by one of my favourite YouTubers, Maria (Northern Heart), I learned about the Swedish craft of making ‘braskotten’. There is an abundance of pine cones in the forests of Sweden, and during the long, cold, and dark winters, there is a great need for ongoing fires to keep houses warm. Dipping pine cones in melted wax turns them into perfect little firelighters: a handy way to get the fire burning strong and hot almost straight away. While such firelighters can be bought from shops or online, Maria demonstrates how easily these can be made at home.
I have adapted Maria’s technique a little, mainly by the way in which I gave the pine cones a wick before turning them into firelighters. This is an extra step that is not completely necessary, but one that I feel makes the firelighters a little safer to use.
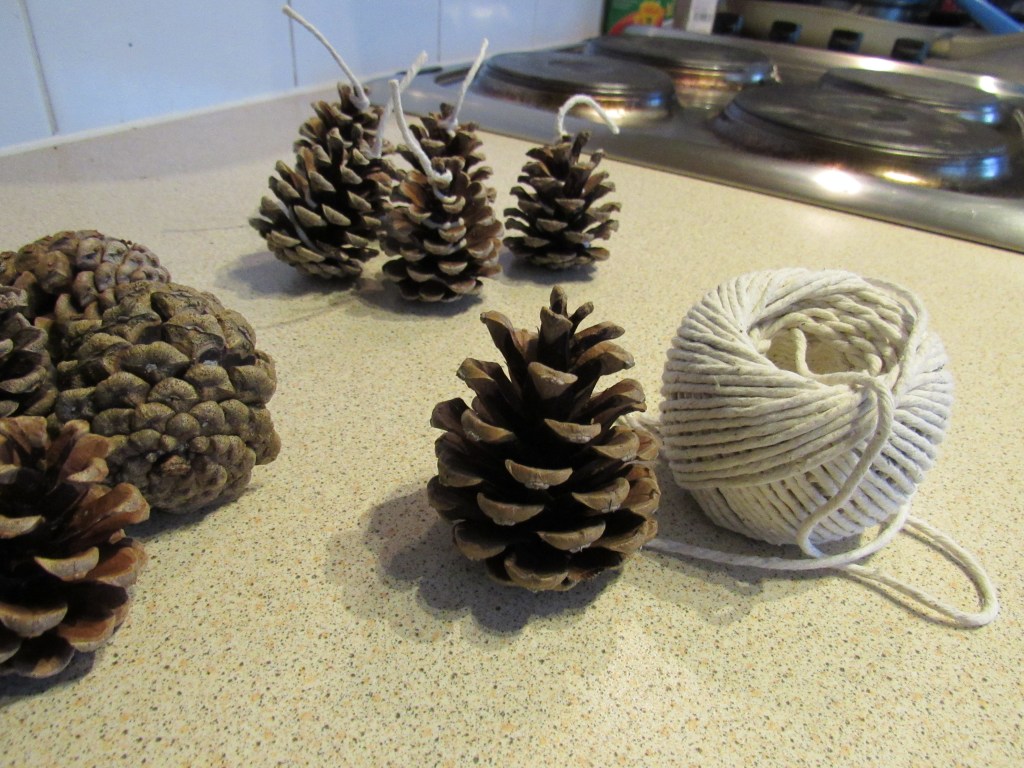
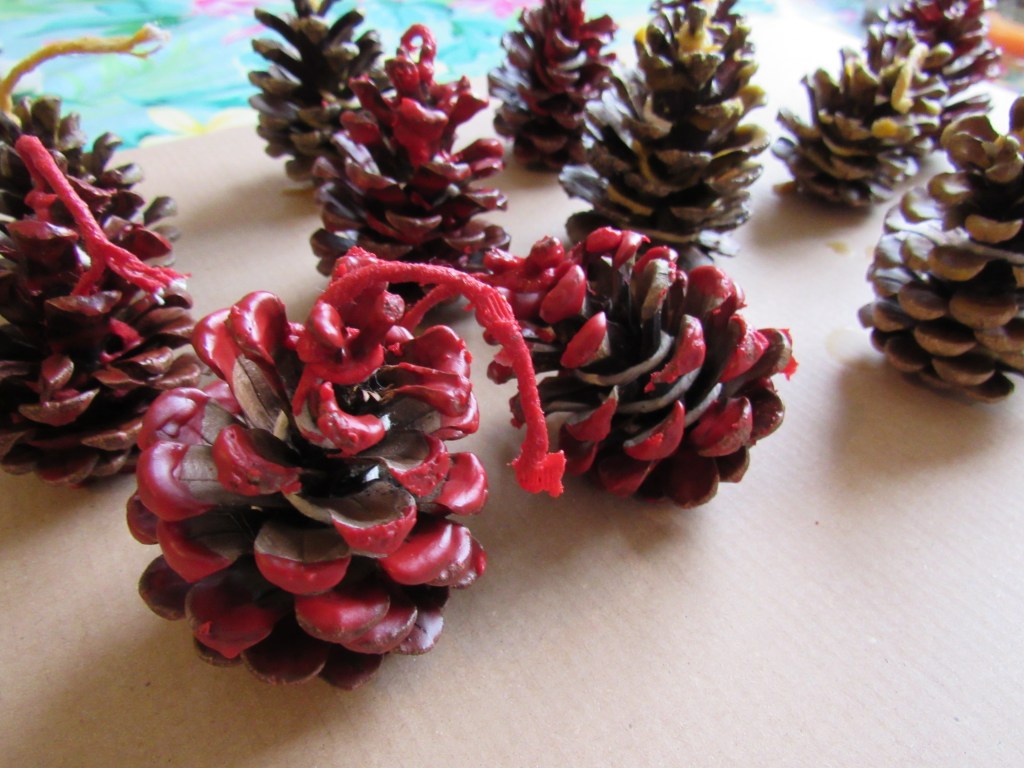
To create wicks I used cotton string, twisting it around and knotting it to the cone. With larger, more splayed pine cones like the ones pictured here, you can begin my tucking the end of the string beneath the lowermost scales – the ones at the base which are most tightly packed together. This will then hold the end of the string while you wrap it around the core of the cone. When you reach the top, tie the string in a simple knot around the top of the cone’s stem, and then measure an inch or two before snipping off the string.
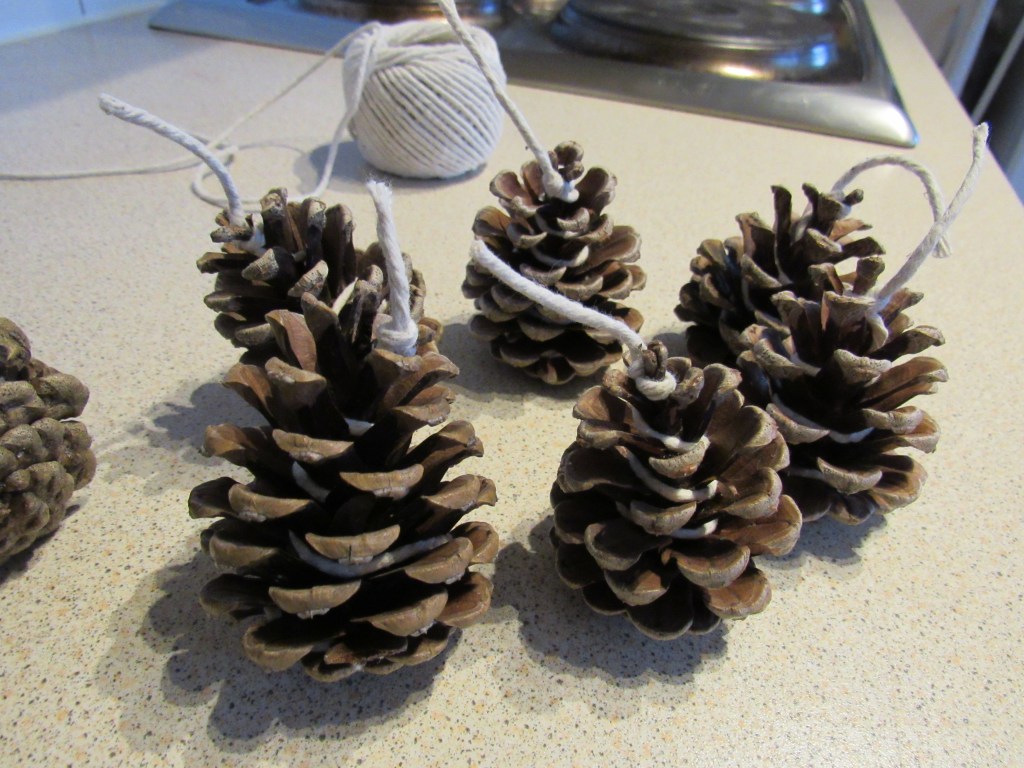
Having a wick makes the firelighters safer to use, as it keeps the flame from your fingers as you hold the cone before placing it in the burner. It also makes the firelighters easier to make. If, like me, you do not have a saucepan you are willing to coat in wax, you cannot simply soak the pine cones by submerging them in a pan. As I melted the wax in smaller tins, the string gave me something to hold on to as I dipped the pine cone into the wax.
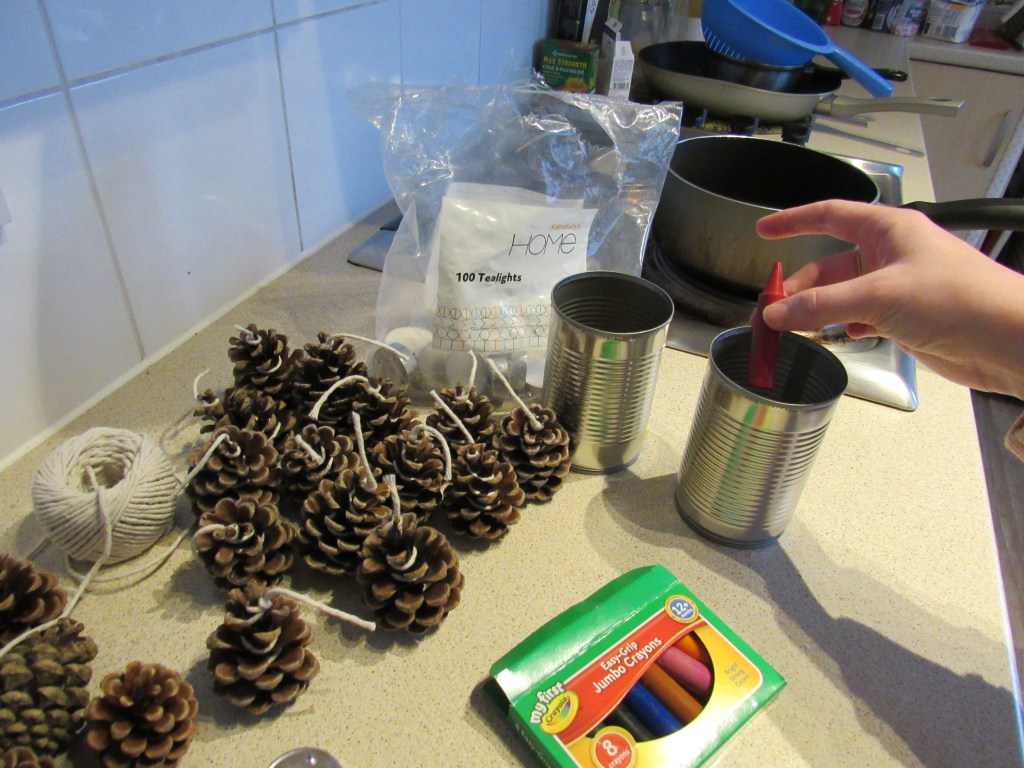
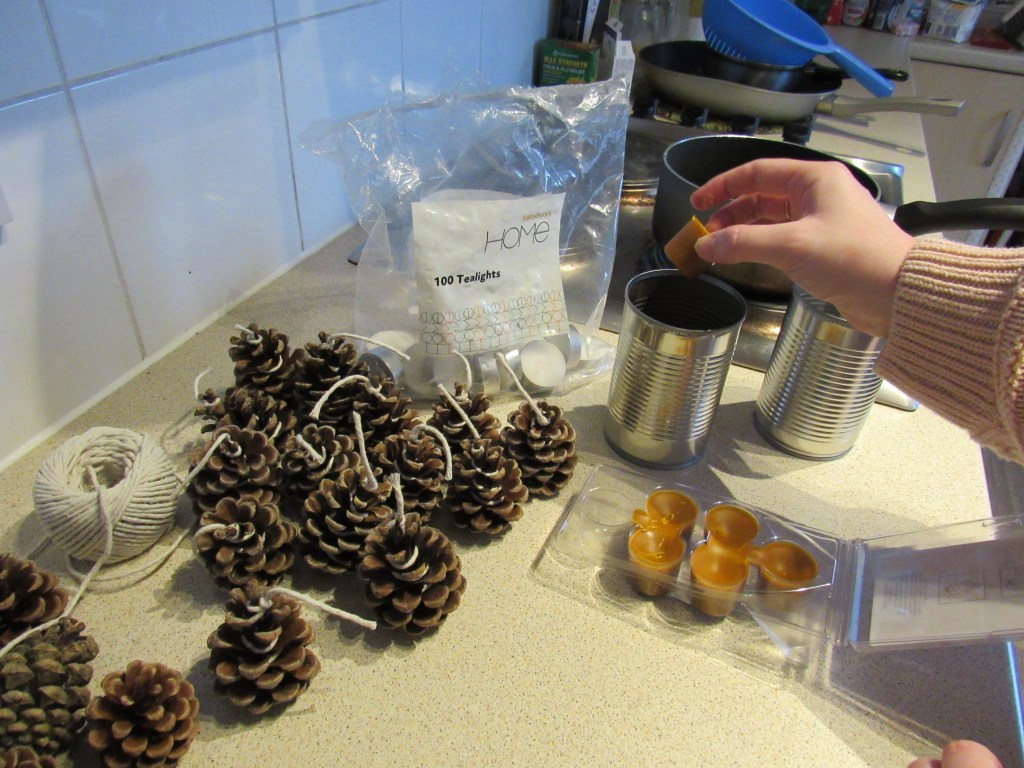
Once you have given your pine cones wicks, you can begin melting the wax. This would be the perfect opportunity to use up the leftover wax from candles you have burned throughout the year, once the wick has broken and it will no longer light. This year, I used the wax of unburned tealights, but I will certainly be more mindful to hold onto my finished candles next year, to use their remaining wax.
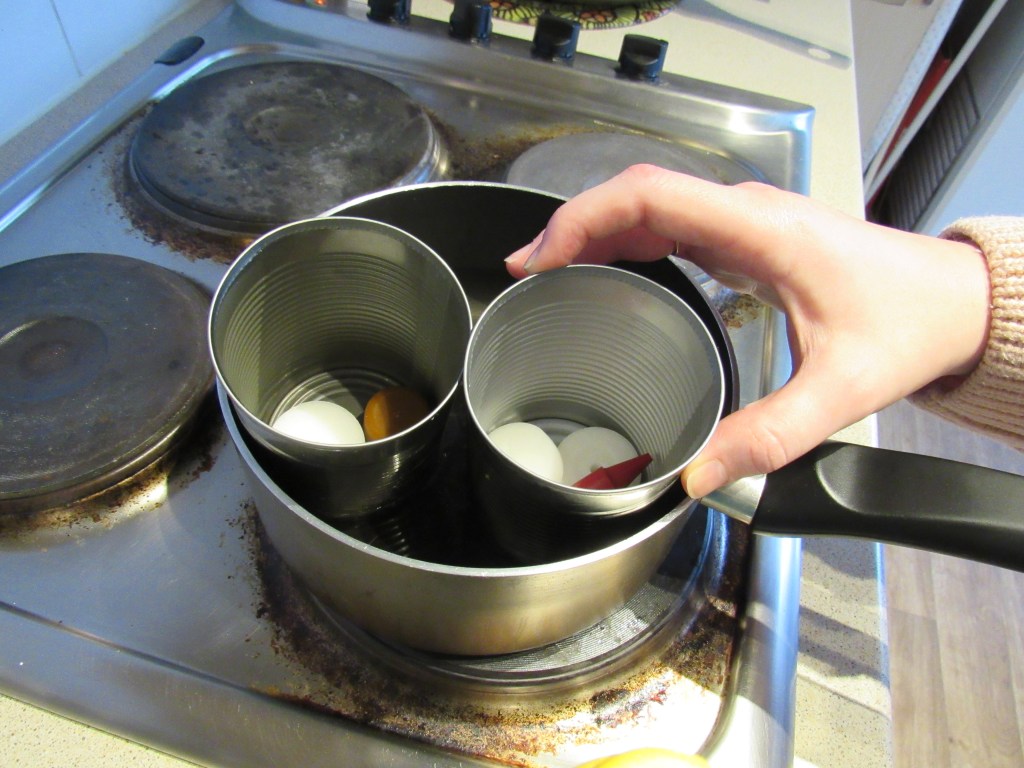
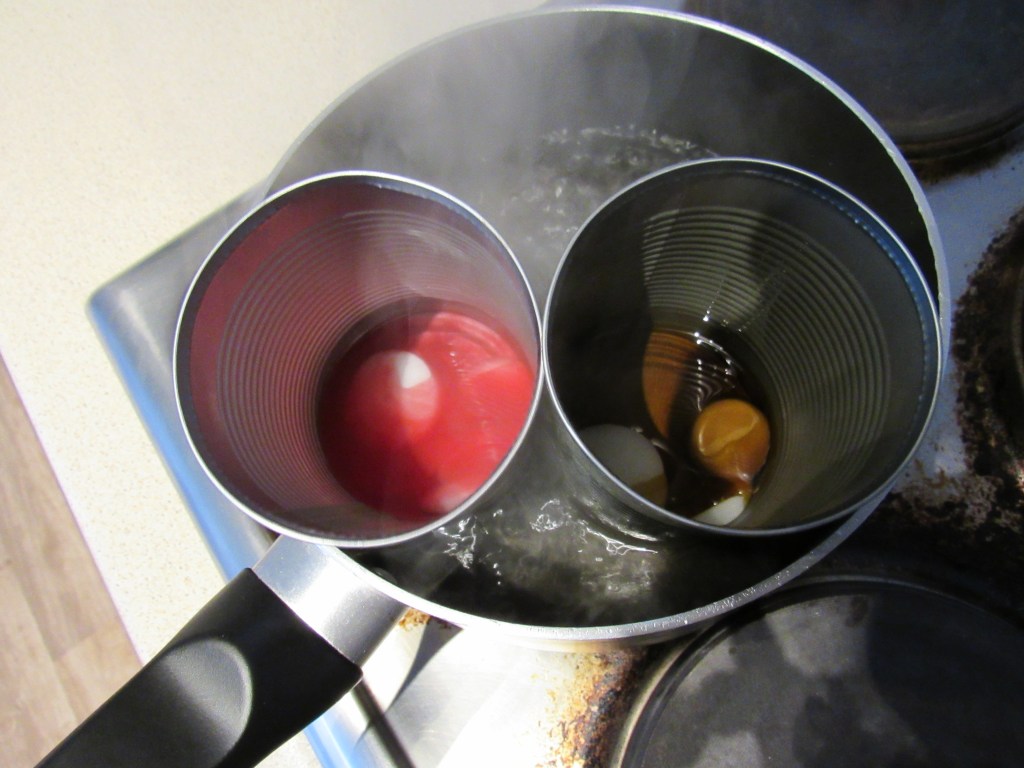
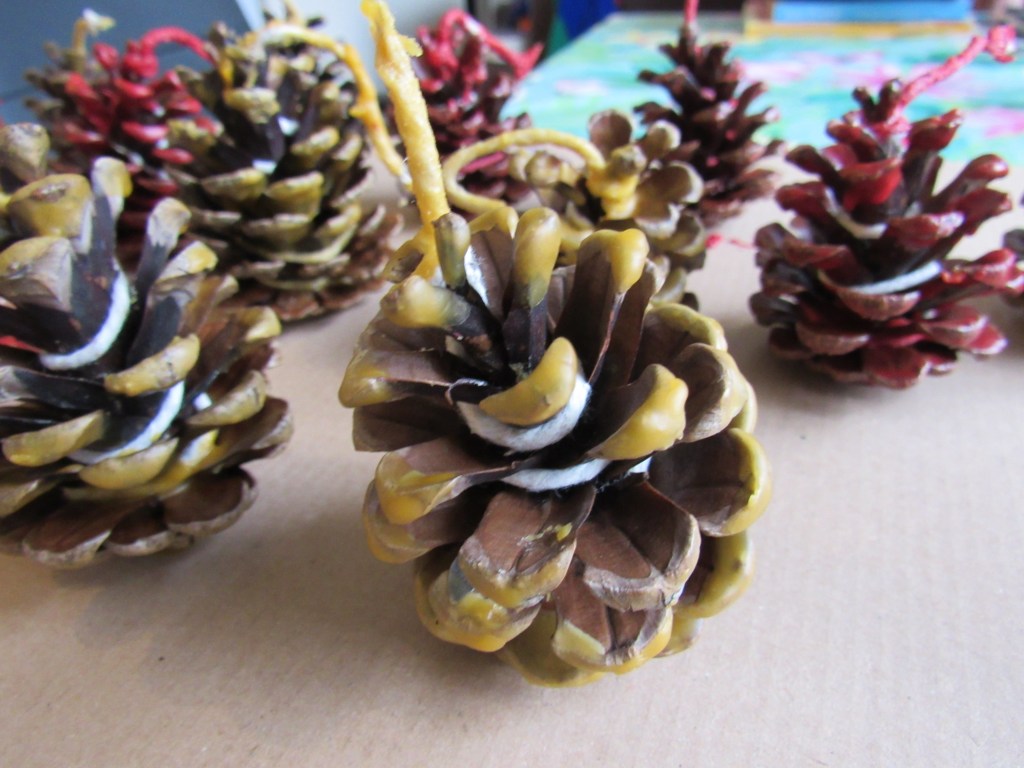
To keep my saucepan wax-free, I took tins from the recycling, and placed them in a pan of water which I brought up to boiling over the stove. In these tins, I placed the wax of a few unscented tealights (with their cases and wicks removed); to give different colours, I melted a red and green crayon into two of the tins, and to give scent, I added gingerbread scented wax melts into the third tin. I found one crayon/wax melt to every three to four tealights was a good ratio, and I was surprised by how far a small amount of wax went to coat the pine cones.
The wax did not take long to melt, and once it had, I picked up my pine cones by the string, and dipped them into the tins. I made sure both the pine cone, and a good length of the wick, had been coated, before pulling them out and placing them to dry on a piece of cardboard.
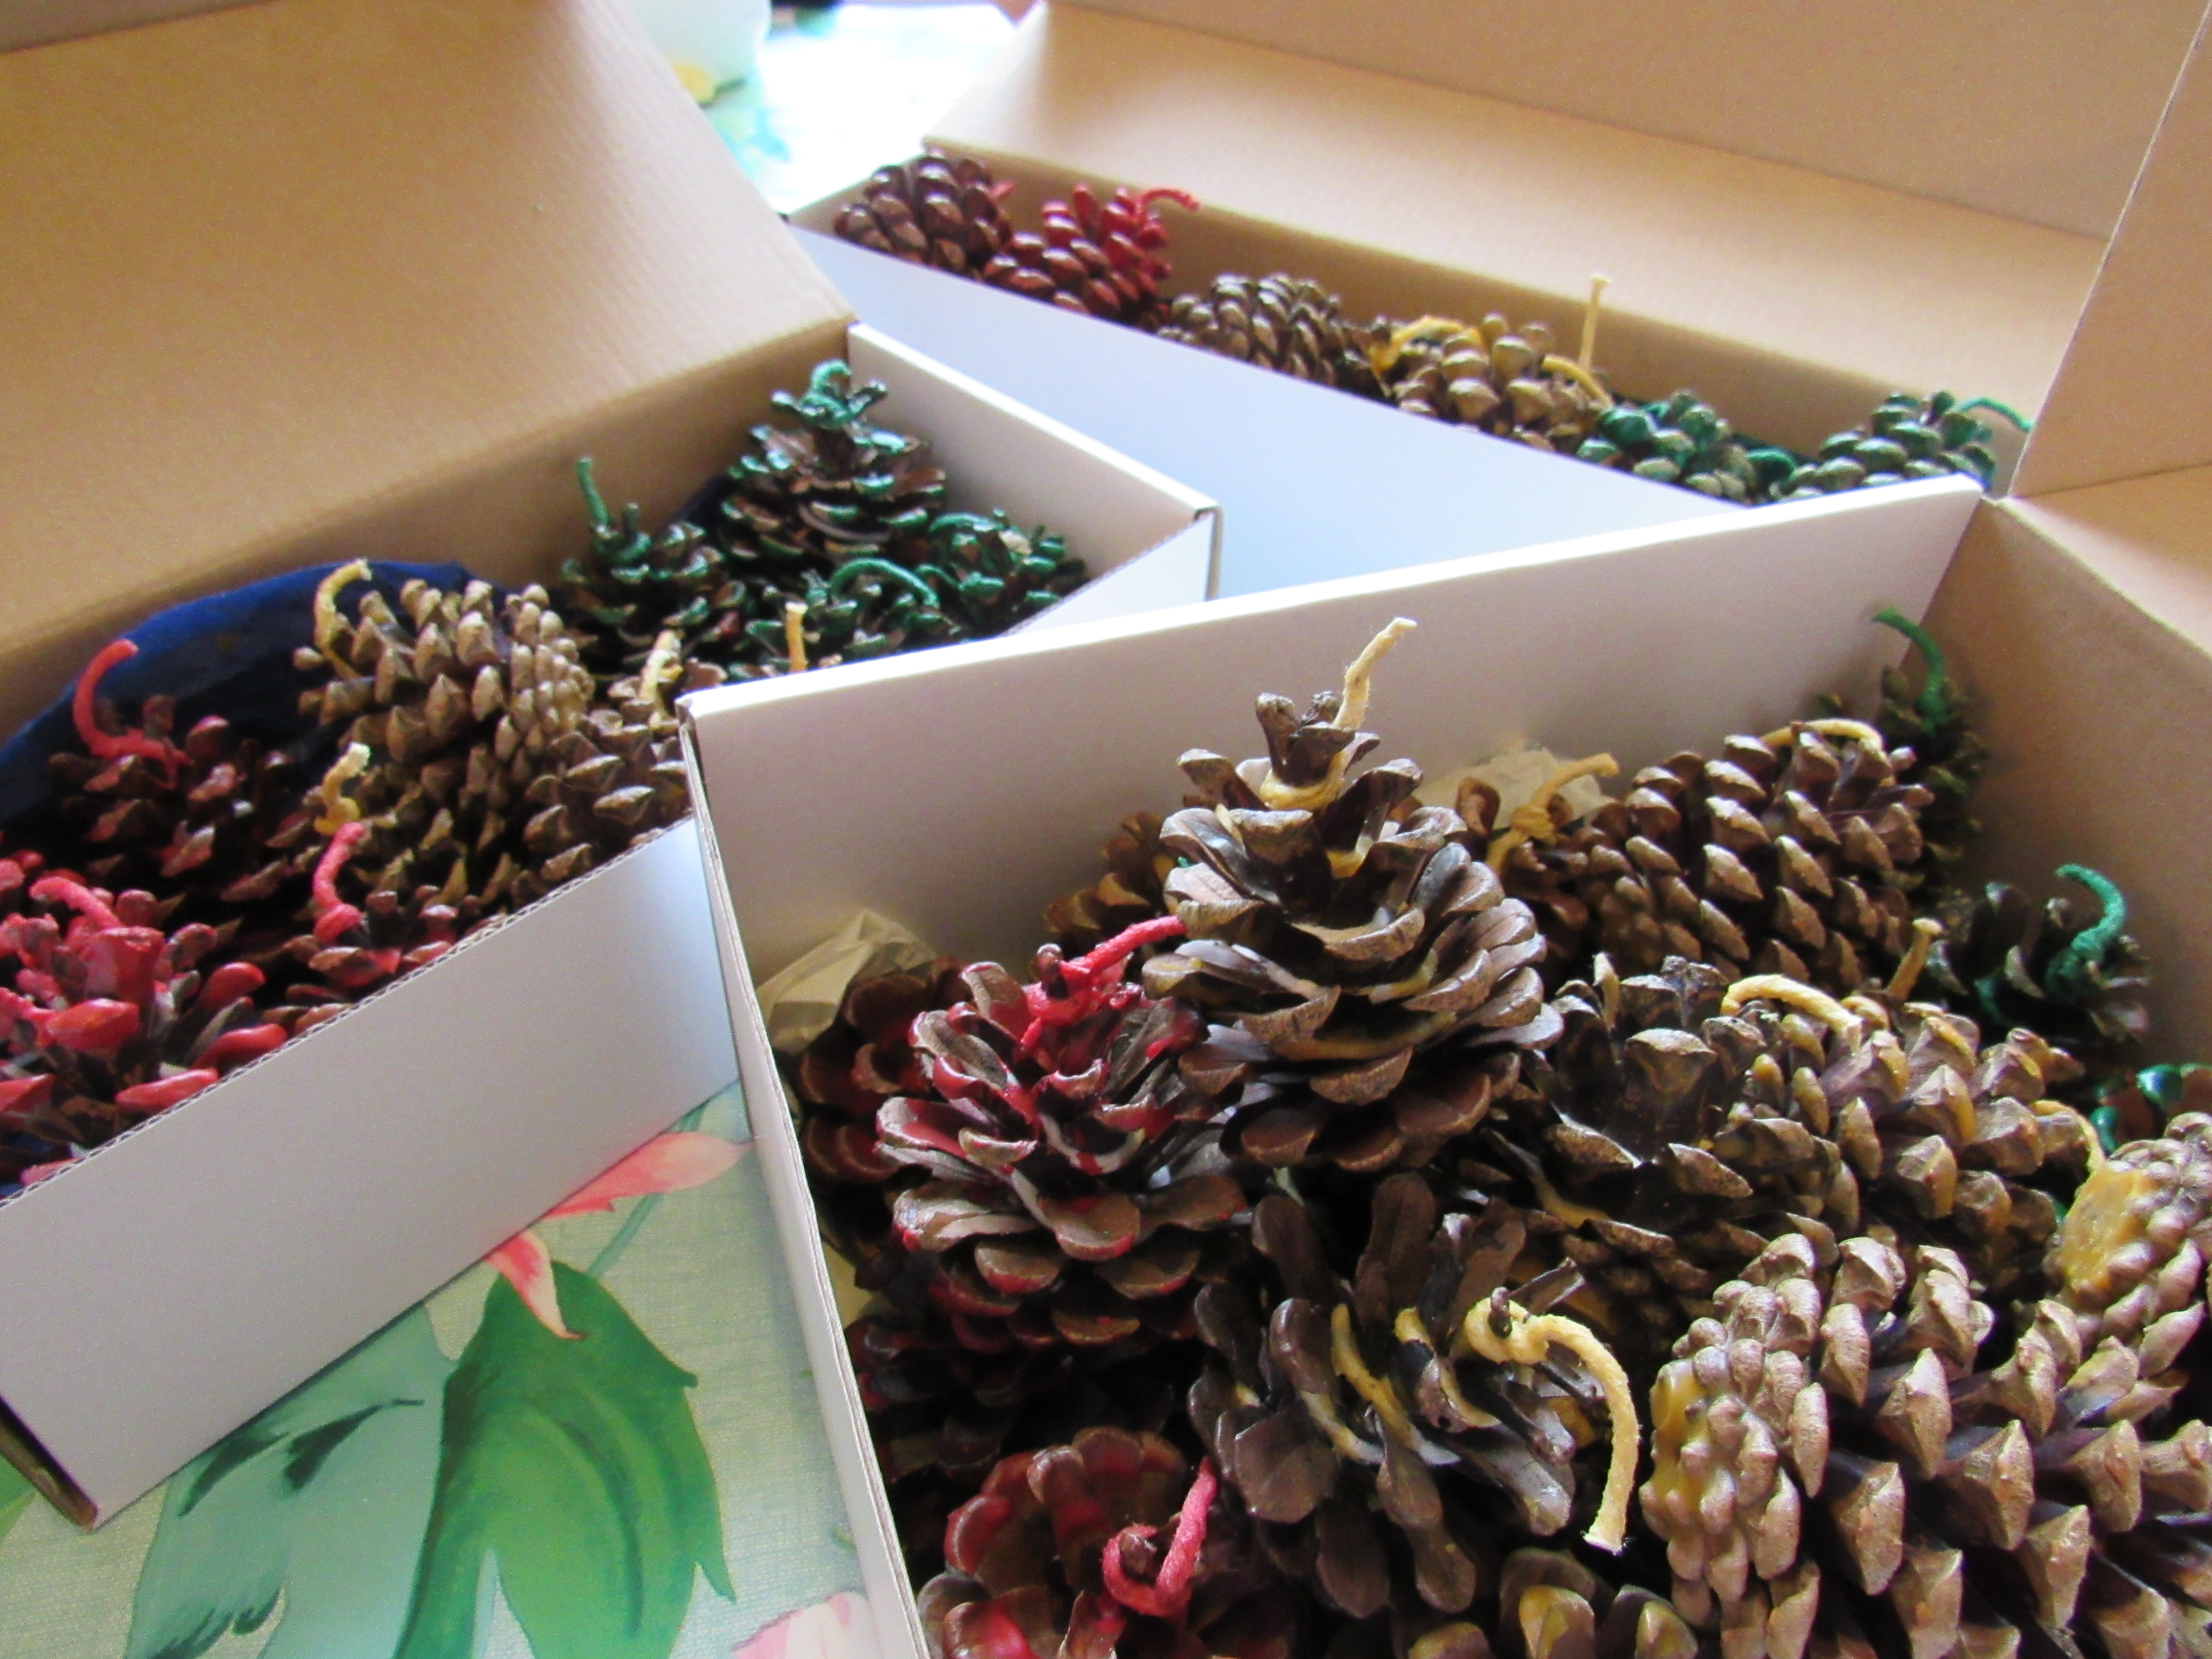
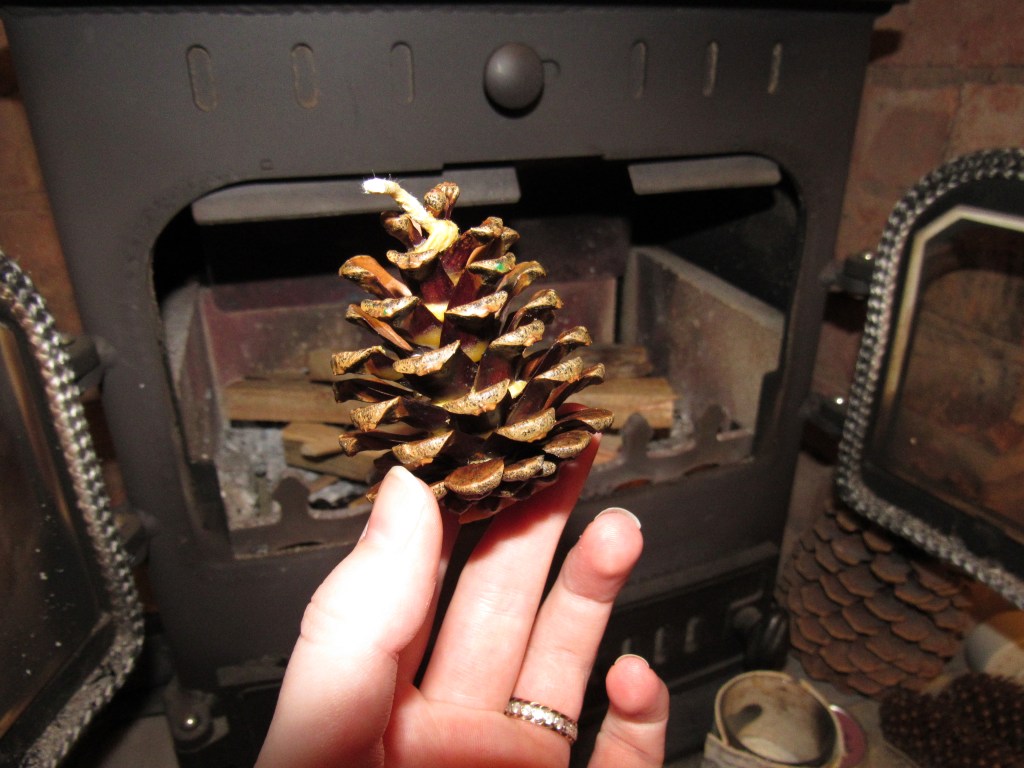
I was really pleased with how bold the colours were as the wax dried on the scales of the pine cones. The ones scented with gingerbread were heavenly, and made the whole kitchen smell like Christmas! When the wax had dried, I cut the wicks down shorter to make them neater. I then packaged the firelighters up in boxes, ready to give to my different family members who have wood burners in their homes.
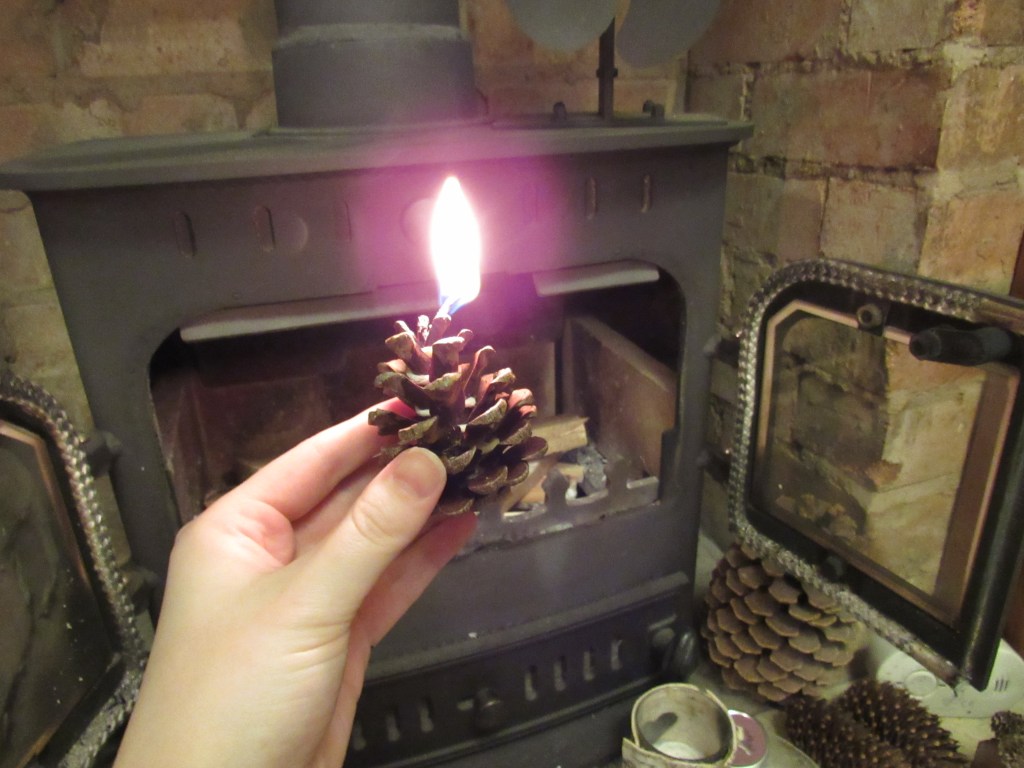
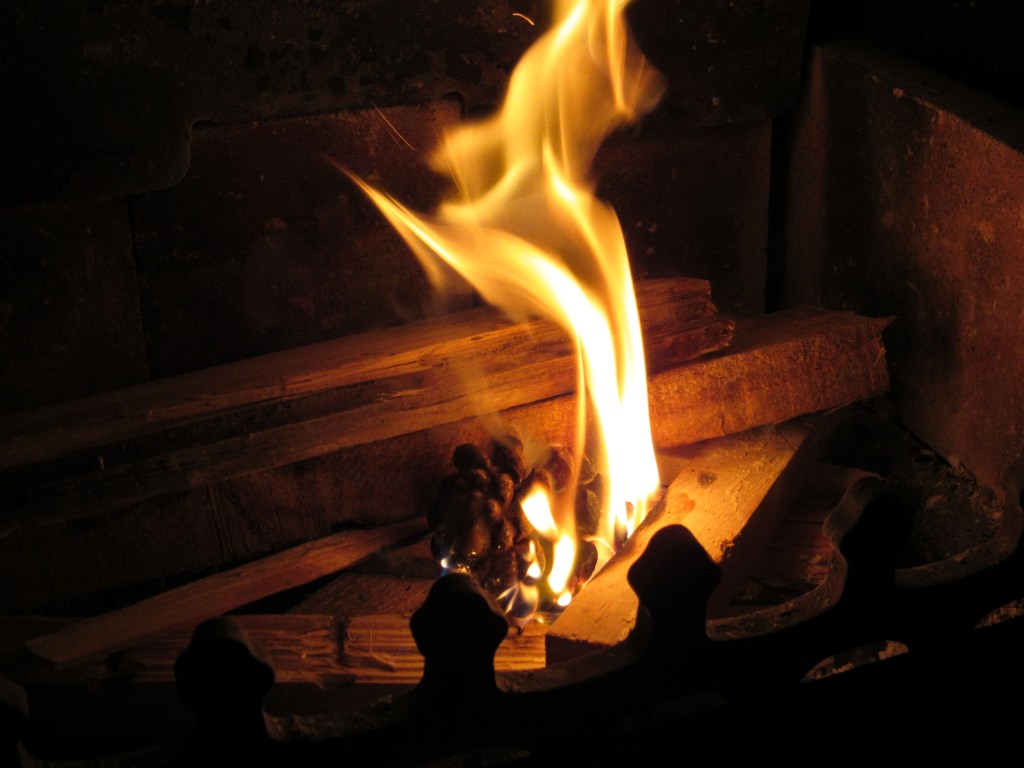
I tested out my own, homemade ‘braskotten’ by lighting up our family’s wood burner for one of the first times this winter. I lit the cone by the wick, and tucked it upside down in a pile of kindling, and very soon it was ablaze. It is safe to say they did what they were designed to do, and I was very satisfied to watch my creation burning away and giving off a lovely gingerbread scent as it warmed our home.
In amongst the boxes, I put a small card which explained the Swedish art of making ‘braskotten’, as well as the definition of the word ‘lagom’ in both Swedish and Norwegian. Similar to the Danish art of ‘hygge’, ‘lagom’ is a lifestyle or mantra that is observed in Scandinavia. In Norwegian it translates as comfort and cosiness, while in Swedish, it has a slightly different meaning: to keep things in balance, and to use just enough – not too much or too little.
Braskotten fit these two definitions very well: as well as being a cosy thing both to create and to use, these natural firelighters use materials which might otherwise go to waste, and replace the need for chemical or synthetic firelighters. These firelighters are cheap, mindful, and environmentally-friendly, as well as being fun to create.
Thanks so much for reading along. If you have made braskotten yourself, I would love to hear all about it!