

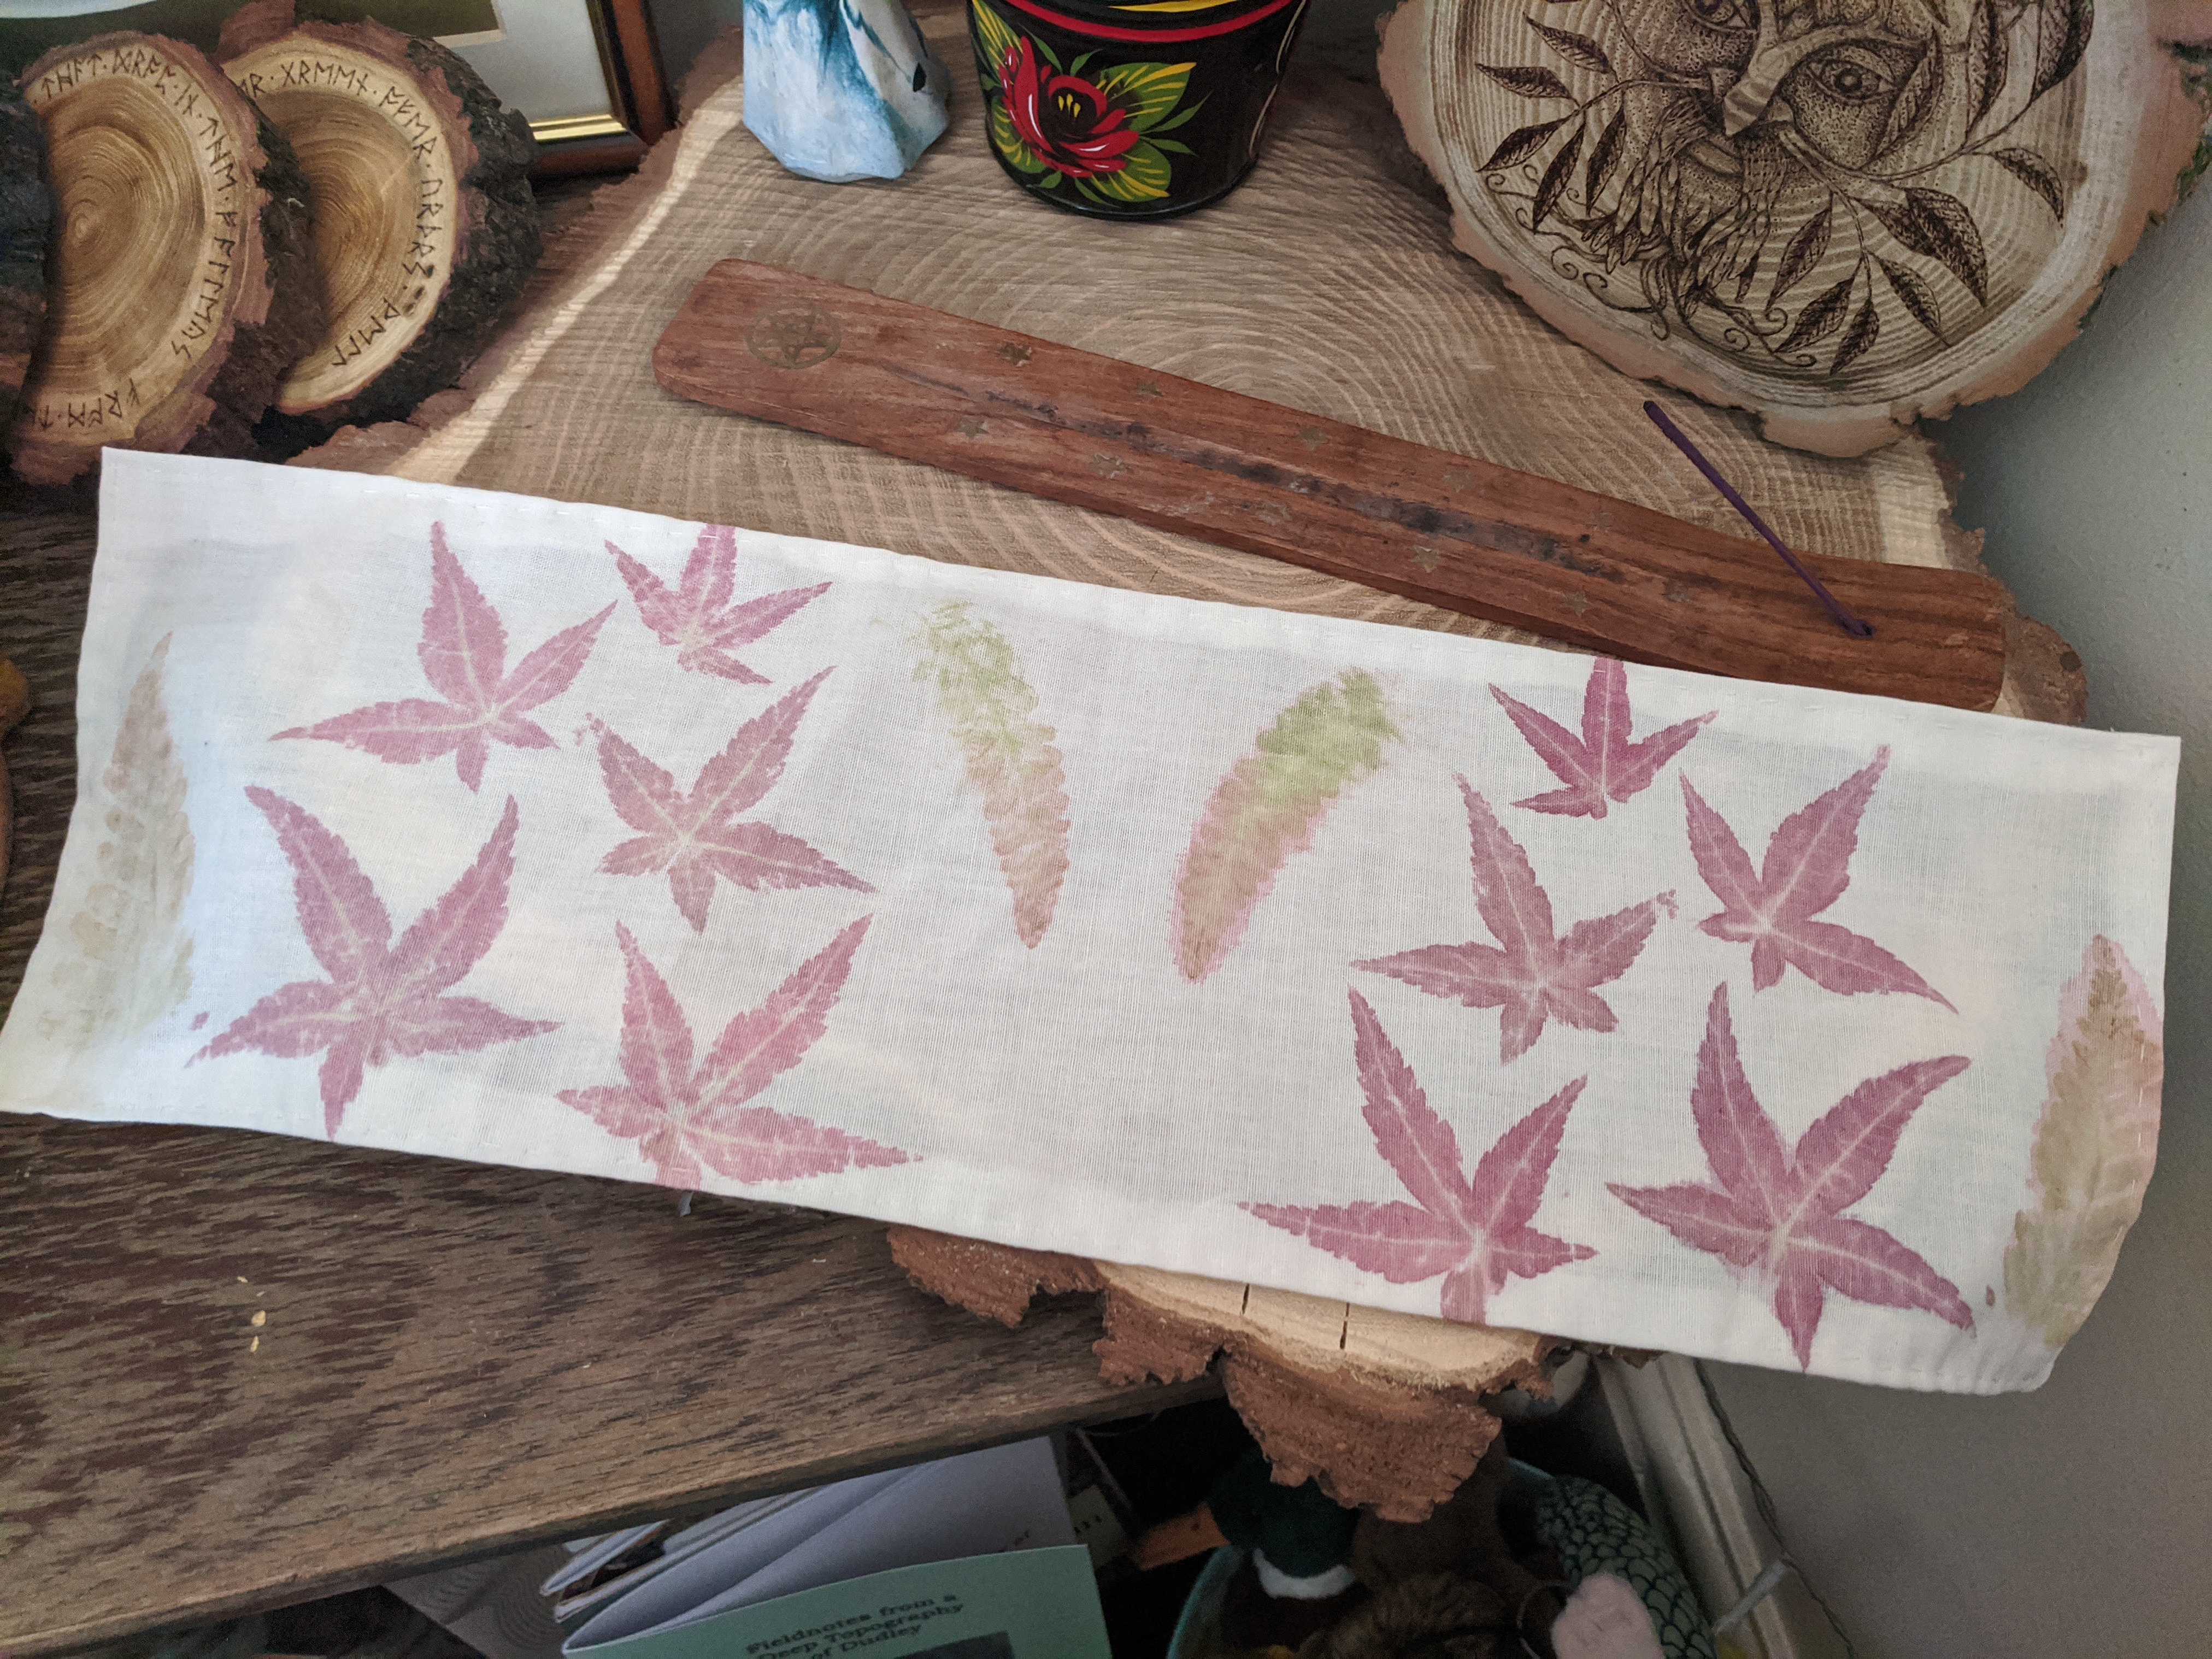
On the weekend I experimented with leaf printing, using leaves from my parents’ garden to imprint distinctive shapes and colours onto fabric. I was really impressed with some of the outcomes: read more about them, and how to have a go yourself, below!
Update! My mom got in touch to tell me this method is actually called ‘hapa zome’, from the Japanese for ‘leaf dye’.
This activity is something my mom, a forest school leader, does with the pupils at her school, and I had a go myself over the weekend when I was home. I had picked up a beautifully coloured leaf on a woodland walk, and thought it would work really well for printing onto fabric. It wasn’t the most successful (more about that below), but I had a go with other leaves from our garden, and they worked much better!
What you’ll need for leaf printing is
- a strip of fabric, double the length of the design you wish to create. Linen, cotton, or muslin are all fabrics I think would work well. I used cut up pieces of a plain bed sheet!
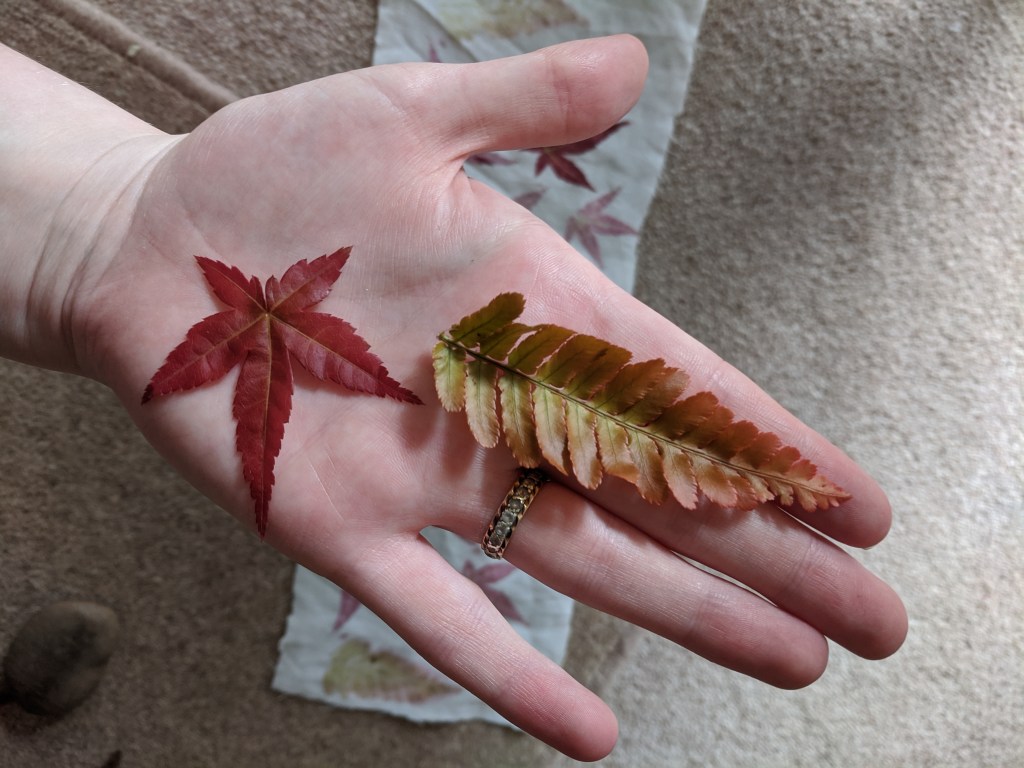
- a selection of colourful leaves you wish to use. The younger and fresher the leaves the better, ideally ones that have only recently sprouted: these are the ‘juiciest’, and transfer their colour better. I found acer leaves and ferns worked well.
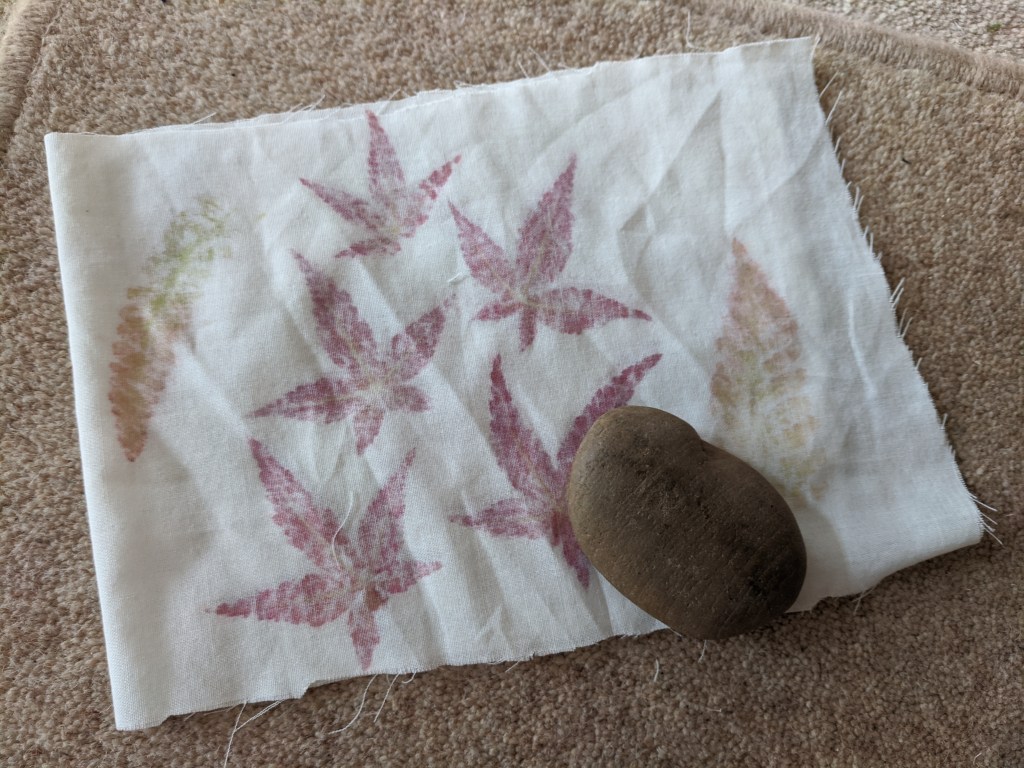
- a small, smooth and blunt stone, one which you can wield with relative ease.
- a flat, hard – but resistant – surface.
Lay down the strip of fabric lengthways on your hard surface. Place the leaves in your desired pattern on one half of the fabric – imagine this being one page in an opened book. It doesn’t matter which half of the fabric you choose, or if your leaves are faced up or down. Then, fold the remainder of the fabric over this design, so the fabric is folded in half with the leaves between. Do this carefully, to make sure your pattern is kept intact!
Then, take your stone in your hand, and with a blunt end or side, begin tapping against the top of the fabric, over the leaves. You’ll need to exert enough force that you see the juice of the leaf beginning to stain the fabric, but not enough that your stone destroys the fabric, or utterly pulverises the leaf in between! As soon as you start seeing a good colour come through, and the shape of the leaf is defined, that’s enough.
Beat the stone over all the leaves in your design. When you’re finished, gently open the piece of fabric out – the leaves will have imprinted both sides, so you’ll have a symmetrical pattern. Carefully pull away what is left of the leaves: sometimes they will simply rub away. Make sure that in doing this, you don’t stain any of the fabric around your pattern, as the shapes of your leaves will not be quite as defined.
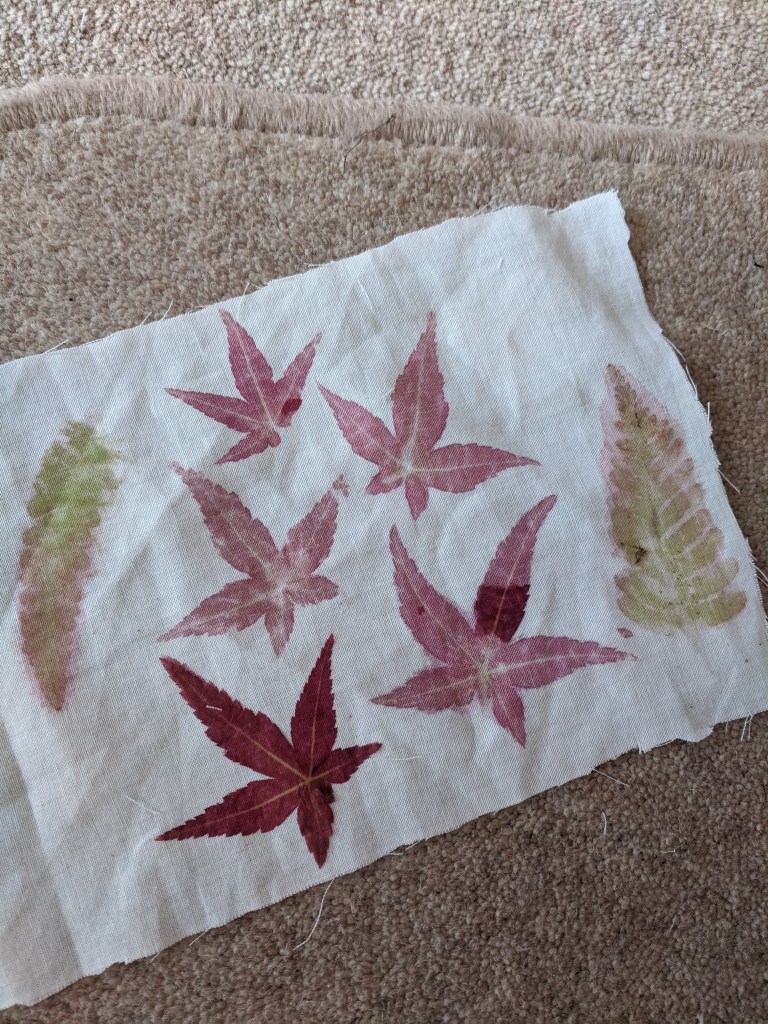
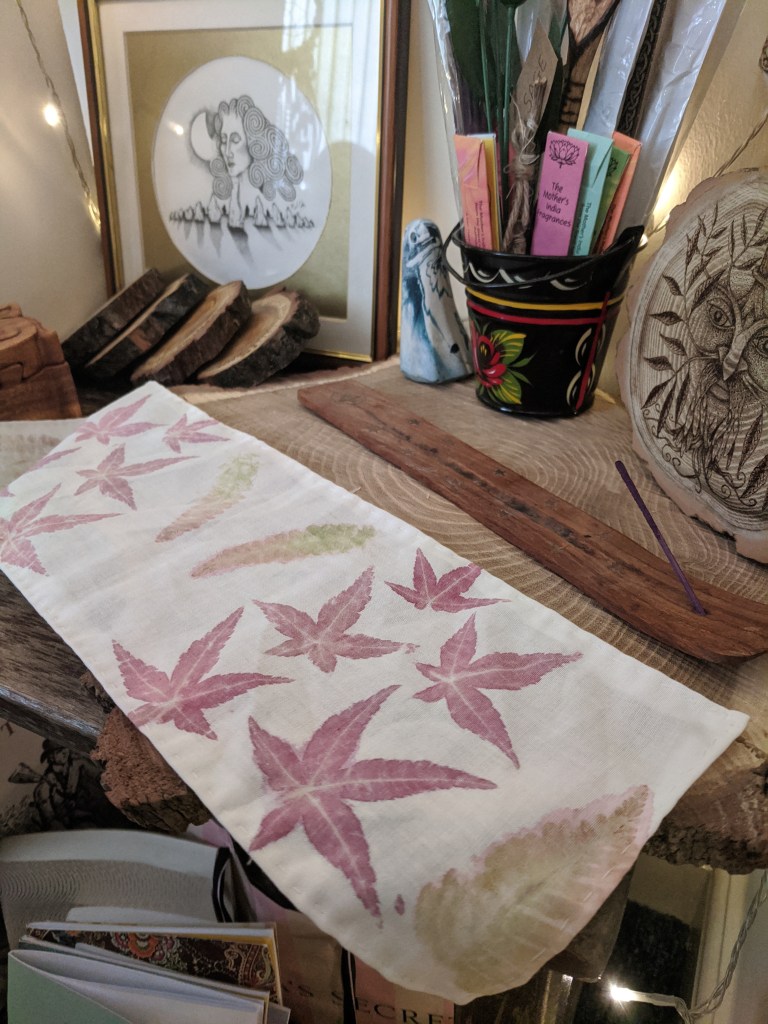
There you have it – a leaf print on fabric! You could experiment with different leaves, patterns, and even trying to use the symmetry of the print to create a striking design. I neatened the rough edges of my piece of fabric with a running stitch, to prevent them from fraying.
I’m really happy with the completed piece, above – but as with any creative endeavour, there were failures along the way. The beautiful sweet chestnut leaf (pictured below), that I picked up on a woodland walk, promised to give striking pastel colours, with a serrated edge and clear veins patterns.
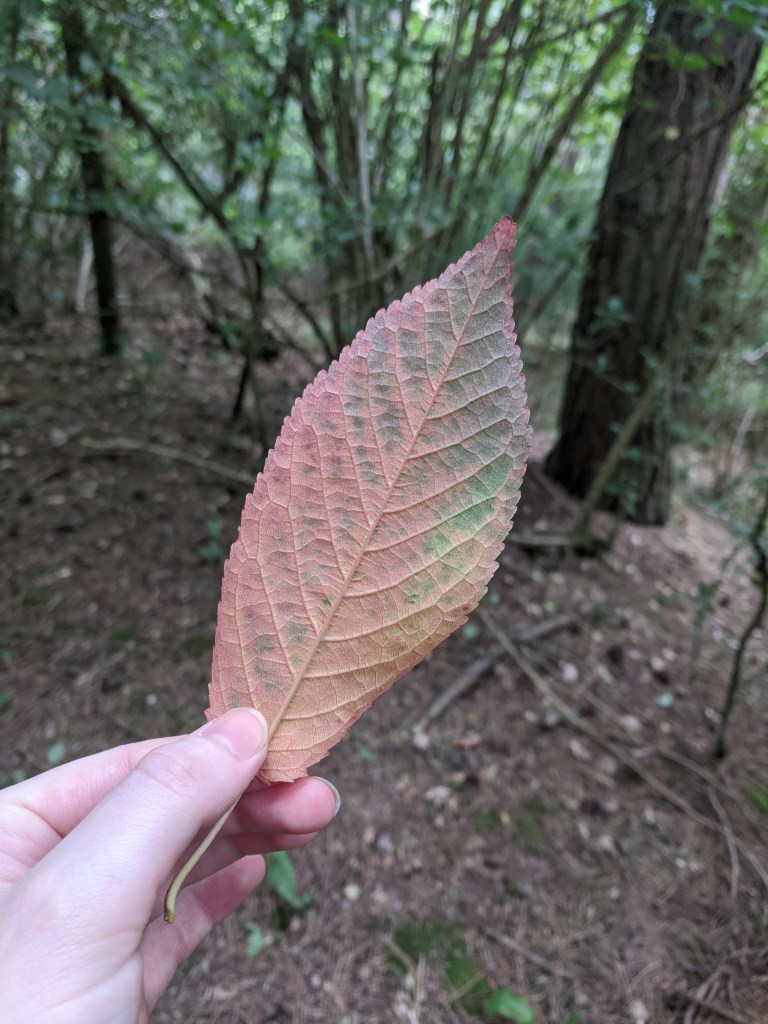
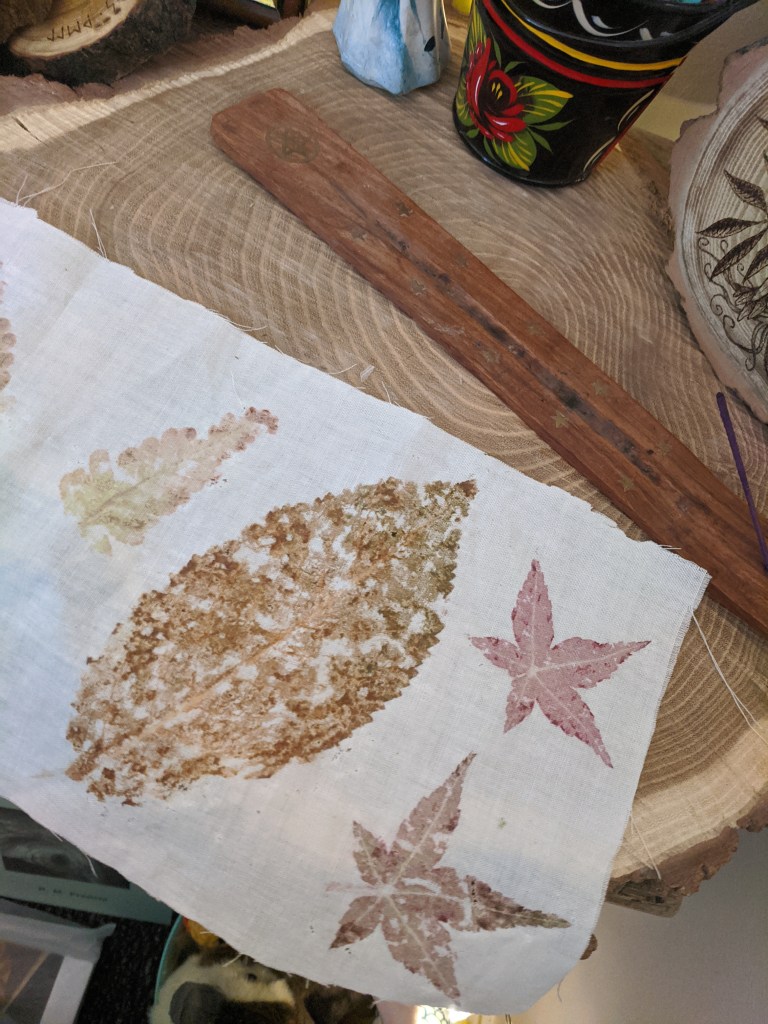
Unfortunately, this wasn’t the case. The leaf wasn’t fresh enough: there was very little juice to press from it, and in trying to get some kind of imprint, the leaf was pulverised between the fabric. It was not easy to peel or rub away, leaving leaf matter on the fabric which was already beginning to brown. The design was also affected through not having a flat surface to work on – the uneven patio tiles, while hard and resistant, meant that the imprint was patchy, and the fabric was beginning to tear and fray from being ground against it.
But, lessons were learnt! I found fresher leaves worked better, so I used only those in my next try. I found a flat surface (just a hardback book), and was a bit lighter with the stone. With fresher leaves, the leaves stain much easier, so less force is required. I definitely would recommend picking leaves off the tree for this, especially ones that have just sprouted, rather than picking leaves off the ground.
Now that I am back in the city, I think I will try to find a way to hang my design up on a wall. I might also try to find some leaves from trees close to my flat to experiment with. If you have tried leaf printing or something similar before, let me know! I’d love to learn what leaves you find work best, or other ways you can print with natural materials.

I was wondering why the Acer looked slightly smaller. Loved the designs.xx
LikeLike
Haha, I definitely didn’t pinch that much! xx
LikeLike